
Affiliate disclosure: This post contains affiliate links. If you buy through them, we may earn a small commission at no extra cost to you. We only recommend products we would use in our own homes.
The average security deposit is one month’s rent — $1,200 to $2,000 for most apartments. Living for years in a beige box just to protect that money is a bad trade.
The good news: renter friendly upgrades can transform how your apartment looks and feels, and every single one comes down, peels off, or unscrews on moving day. The trick is knowing which changes are genuinely safe — and which “renter-friendly” products quietly cause damage anyway.
This guide rates every upgrade honestly: Safe (always deposit-friendly), Test first (depends on your walls and surfaces), or Skip (marketed to renters, risky in practice).
⬇ Free Download: The Furniture Buying Guide
Buying furniture for your rental? Our free 24-page Furniture Buying Guide covers measuring, quality checks, and budget planning — so every piece fits your space and moves with you to the next one.
Before You Change Anything: The 3-Minute Lease Check
Your lease decides what is allowed, not a blog post. Before buying anything, scan it for four things: rules on painting, adhesive products, hanging items, and “restore to original condition” language.
Take dated photos of every wall and floor before you start. If a dispute ever happens, before-and-after photos are your strongest protection.
One rule covers almost everything in this guide: if you can remove it in under an hour and leave the surface as you found it, it is renter-safe.
Start With the Renter Friendly Upgrades That Are Always Safe
These need no test patch and no landlord conversation. They work in every rental.
1. Swap cabinet knobs and drawer pulls
Unscrew the old hardware, screw in the new. Standard cabinets use the same screw spacing, so most swaps take minutes per handle.
Keep every original knob in one labeled bag in a kitchen drawer. On moving day, swap them back and take your nice hardware to the next place.
Cost: about $2–$6 per pull. Deposit risk: none, as long as you keep the originals.
Pros
- Instant kitchen and bathroom refresh
- Fully reversible in minutes
- Hardware moves with you to the next home
Cons
- Unusual screw spacing on old cabinets may limit choices
- Easy to lose originals if you don’t bag them immediately
2. Change switch plates and outlet covers
Decorative plates screw on exactly like the plain ones. The originals go back on in the same holes with the same screws.
Cost: $2–$8 per plate. Deposit risk: none.
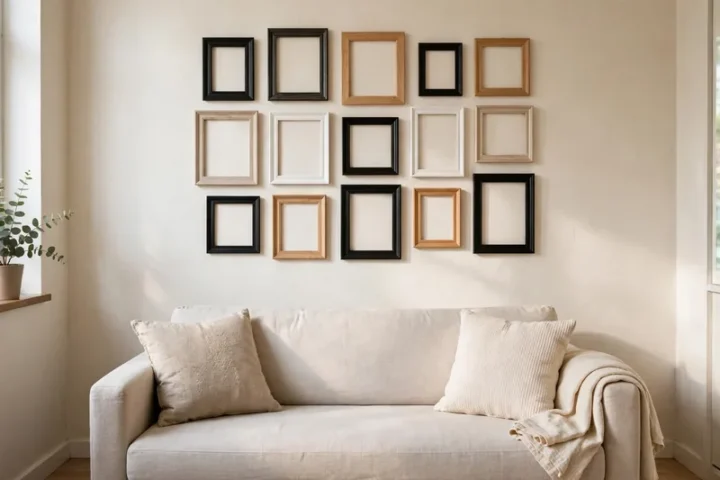
3. Lean large art and mirrors instead of hanging them
A large mirror or framed print leaned on a console, dresser, or the floor looks deliberate and high-end — and needs zero hardware.
Anchor tall pieces against tipping, especially with kids or pets around. A small strip of museum putty behind the top edge does it.
Cost: whatever the piece costs; no hardware needed. Deposit risk: none.
4. Layer rugs over rental flooring
A rug protects the floor underneath it (which landlords quietly appreciate) and defines zones in open-plan rooms.
One caution: on hard floors, let the floor dry fully after mopping before the rug goes back down. Trapped moisture is the one way a rug can damage flooring.
Cost: $40–$200 depending on size. Deposit risk: none when kept dry underneath.
5. Use tension rods instead of curtain hardware
Tension rods hold curtains, sheers, and even light shelving with no screws at all. They also work as closet dividers and under-sink organizers.
Don’t overtighten — cranked too hard, a rod can dent soft drywall at the ends.
Cost: $8–$20 each. Deposit risk: none when fitted snugly, not forced.
6. Add plug-in lighting
Rentals are famous for one harsh ceiling light per room. Plug-in sconces, picture lights, and LED strip lighting fix that without an electrician or a single drilled hole.
Most plug-in sconces mount with two small screws — or use adhesive cable channels to hide the cord for a built-in look. LED strips peel off most surfaces cleanly.
Cost: $15–$60 per light. Deposit risk: none for plug-in types.
7. Freestanding storage everywhere
Over-door organizers, rolling carts, stackable bins, and adjustable shelving add storage without a single built-in. They also all leave with you when you move.
Cost: $15–$80 per piece. Deposit risk: none.
Test First: Great Upgrades That Depend on Your Walls
These renter friendly upgrades are the biggest transformations on the list — and the ones where one hidden test saves your deposit.
8. Peel-and-stick wallpaper
One accent wall behind a bed or sofa is the single most dramatic reversible change you can make. A roll covers about 28 sq ft and costs roughly $25–$45.
The honest catch: peel-and-stick releases cleanly from cured satin or semi-gloss paint, but it can pull paint from flat or matte finishes, and from any paint applied in the last 30 days.
The test: stick a small piece inside a closet for two weeks. Peel slowly, pulling back against itself. If paint comes with it, the product fails on your walls — stop there.
Deposit risk: low on gloss finishes, real on matte. Always test.
9. Peel-and-stick backsplash and floor tile
These transform dated kitchens and bathrooms fast, and quality versions are designed for renters.
Adhesive can struggle in heat (behind a stove) and can bond to old vinyl flooring. Smooth, clean, dry surfaces only — never over peeling paint or damaged finishes. Keep spare tiles for repairs.
Cost: $10–$30 per pack. Deposit risk: low-to-moderate; test one tile first.
10. Command strips and adhesive hooks
For art under about 7 kg / 16 lb total per hanging set, heavy-duty picture strips are reliable on smooth painted walls. Follow the weight rating on the pack — most failures come from overloading.
They grip poorly on textured walls and wallpaper. On smooth paint, removal is clean when you pull the tab straight down as directed.
Cost: $5–$15 per pack. Deposit risk: low on smooth walls, moderate on textured ones.
The 2-Week Test That Protects Your Deposit
Any adhesive product, any wall — this is how you know it is safe for your apartment, not someone else’s:
- Pick a hidden spot: inside a closet, behind a door, behind furniture.
- Apply a small piece of the exact product you plan to use.
- Press for the full time the packaging states. Leave it alone.
- Wait at least two weeks — fresh or low-quality paint needs the full test.
- Peel slowly, down and back against itself, never straight out.
- If any paint or texture comes away, that product is not safe on your wall. Full stop.
What to Skip, Even Though It’s Sold to Renters
- Adhesive “heavy-duty” mounts for TVs and large shelves. The rating is for the strip, not your paint. Big items belong on leaning stands or floor furniture.
- Peel-and-stick anything over fresh paint (under 30 days). No adhesive releases reliably from uncured paint.
- Contact paper on porous or unsealed surfaces. Wood and stone can hold the adhesive permanently.
- “Removable” products with no brand and no removal instructions. If the maker won’t explain how it comes off, it probably doesn’t come off clean.
Quick Reference: Renter Friendly Upgrades, Cost, and Risk
| Upgrade | Typical cost | Deposit risk |
|---|---|---|
| Cabinet hardware swap | $2–$6 per pull | None |
| Switch plates | $2–$8 each | None |
| Leaning art & mirrors | Piece cost only | None |
| Rugs | $40–$200 | None (keep floor dry) |
| Tension rods | $8–$20 | None |
| Plug-in lighting | $15–$60 | None |
| Freestanding storage | $15–$80 | None |
| Peel-and-stick wallpaper | $25–$45 per roll | Test first |
| Peel-and-stick tile | $10–$30 per pack | Test first |
| Adhesive strips & hooks | $5–$15 per pack | Low (smooth walls) |
Frequently Asked Questions
What are the safest renter friendly upgrades?
The safest renter friendly upgrades are hardware swaps, switch plates, leaning art, rugs, tension rods, plug-in lighting, and freestanding storage. None of them touch your walls or surfaces permanently, and all of them reverse in minutes.
Will peel-and-stick wallpaper damage my walls?
It depends on your paint. On cured satin or semi-gloss paint it usually releases cleanly. On flat or matte paint — or paint under 30 days old — it can pull paint off. Always run the two-week test patch first.
How do I prove I didn’t damage the apartment?
Take dated photos of every wall, floor, and surface before you change anything, and again after you restore it at move-out. Keep the photos with your lease documents.
What should I upgrade first in a new rental?
Lighting and textiles. Plug-in lamps and layered rugs change how a room feels more than anything else per dollar — and both are zero-risk. Then do hardware swaps, and test adhesives only once you know your walls.
Can my landlord charge me for small nail holes?
Rules vary by state and lease. Many places treat a few small holes as normal wear and tear; others charge per hole. The upgrades in this guide avoid the question entirely by using no nails at all.
The Bottom Line
You do not have to choose between a home you love and a deposit you get back. Start with the always-safe renter friendly upgrades, test any adhesive before you commit a whole wall to it, and photograph everything before and after.
Do that, and you will hand back the keys to an apartment that looks exactly as you found it — after living in one that felt like yours.
Keep reading: our 10 smart checks before you buy furniture, these cozy fall decor ideas for small apartments, and our small-space furniture buying guides.
Last updated: October 20, 2026

Sarah Mitchell
Sarah Mitchell writes store guides for Dekor Ideas. We're an independent site not affiliated with American Furniture Warehouse. Her guides are based on retailer information, trade press, and shopper feedback, checked and updated as details change.